Shotgun Microphones Usage Indoors

Note: This is an entry I recovered from the old version of this blog and although is around 5 years old (!), I still think the information can be relevant and interesting. So here is the original post with some grammar and punctuation fixes. Enter 2012 me:

So I have been researching an idea that I have been hearing for a while:

"It’s not a good idea to use a shotgun microphone indoors."

Shotgun microphones

The main goal of these devices is to enhance the on axis signals and attenuate the sound coming form the sides. In other words, make the microphone as directional as possible in order to avoid unwanted noise and ambience.

To achieve this, the system cancels unwanted side audio by delaying it. The operating principle is based on phase cancellation. At first, the system had a series of tubes with different sizes that allowed the on axis signals to arrive early but forces the off-axis signals to arrive delayed. This design, created by the prolific Harry Olson eventually evolved in the modern shotgun microphone design.

Indirect signals arrive delayed. Sketch by http://randycoppinger.com/

In Olson’s original design, in order to improve directivity you had to add more and more tubes, making the microphone too big and heavy to be practical. To solve this, the design evolved into a single tube with several slots that behaved in an equivalent manner to the old additional tubes. These slots made the off-axis sound waves hit the diaphragm later, so when they were combined with the direct sound signal, a noise cancellation occurred, boosting the on-axis signal.

This system has its limitations. The tube needs to be long if we want to cancel low enough frequencies. For example, a typical 30 cm (12″) microphone would start behaving like a cardioid (with a rear lobe) under 1,413 Hz. If we want to go lower, the microphone would need to become too big and heavy. Like this little fellow:

Electro Voice 643, a 2 meters beast that kept it directionality as low as 700 Hz. Call for a free home demostration!

On the other hand, making the microphone longer makes the on-axis angle narrower, so the more directive the microphone is, the more important is a correct axis alignment. The phase cancelation principle also brings consequences like comb filtering and undesirable coloration when we go off axis. This can work against us when is hard to keep the microphone in place, hence this is why these microphones are usually operated by hand or on cranes or boom poles.

In this Sennheiser 416 simplified polar pattern, we can appreciate the directional high frequencies (in red) curling on the sides. The mid frequencies (in blue) show a behaviour somewhere between the highs and a typical cardioid pattern (pictured in green) with a rear lobe.

mg19shotgunrotated.jpeg

This other pattern shows an overall shotgun microphone polar pattern. The side irregularities and the rear lobe are a consequence of the interference system.

Indoor usage

The multiple reflections in a reverberant space, specially the early reflections, will alter how the microphones interprets the signals that reach it. Ideally, the microphone, depending of the incidence angle, will determine if the sound is relevant (wanted signal) or just unwanted noise. When both the signal and noise get reflexed by nearby surfaces they enter the microphone in “unnatural” angles (If we consider natural the direct sound trajectory). The noise then is not properly cancelled since it does not get correctly identified as actual noise. Moreover, part of the useful signal will be cancelled, because it is identified as noise.

For that reason, shotgun microphones will work best outdoors or at least in spaces with good acoustic treatment.

Another aspect to have in mind is the rear lobe that these microphones have. Like we saw earlier this lobe captures specially low frequencies so, again, a bad sounding room that reinforces certain low frequencies is something we want to avoid when using a shotgun microphone. When we have a low ceiling, we are sometimes forced to keep the microphone very close to it so the rear lobe and the proximity effect combines and can make the microphone sound nasty. This is not a problem in a professional movie set where you have high ceilings and good acoustics. In fact, shotgun microphones are a popular choice in these places. 

Lastly, the shotgun size can be problematic to handle in small places, specially when we want precision to keep on axis. 

The alternative

So, for indoors, a better option would be a pencil hipercardioid microphone. They are quite smaller and easier to handle in tight spaces and more forgiving in the axis placement. Moreover, they don’t have an interference tube, so we won't get unwanted colorations from the room reflections.

Is worth noting that these microphones still have a rear lobe that will affect even the mid-high frequencies, but not as pronounced.

So hypercardioid pencil microphones are a great choice for indoors recording. When compared to shotguns, we are basically trading off directionality for a better frequency response and a smaller size.

Exploring Sound Design Tools: Paulstretch

Have you heard this?

That video was, years ago, my introduction to "Paul's Extreme Sound Stretch" or just Paulstretch for short, a tool created by Paul Nasca that allows you to stretch audio to ridiculously cosmic lengths

Some years ago it was fashionable to grab almost anything, from pop music to the simpsons audio snippets, stretch them 800% and upload them to youtube. When the dust settled we were left with an amazing free tool that has been extensively used by musicians and sound designers. Let's see what it can do.

I encourage you to download Paulstretch and follow along:

Windows - (Source)
Mac - (Source)

The stretch engine

The user interface may seem a bit cryptic at first glance but is actually fairly simple to use. Instead of going through every section one by one, I will show how different settings affect your sounds with actual examples. For a more exhaustive view, you can read the official documentation and this tutorial before diving in.

As you can see above, there are four main tabs on the main window: Parameters, Process, Binaural beats and Write to file. I'm just going to focus on the most useful and interesting settings from the first two tabs.

Under Parameters, you can find the most basic tools to stretch your sounds. The screenshot shows the default parameters when you open the software and import some audio. 8x is the default stretch value, that may explain why so many of those youtube videos where using a 800% stretch.

The stretch value lets you set how much you want to stretch your sound. You have three modes here. Stretch and Hyperstretch will make sounds longer. Be careful with Hyperstretch because you can create crazily long files with it. There is also a Shorten mode that does the opposite, makes sounds shorter. If you want to make a sound infinite,  you can freeze the sound in place to create an infinite soundscape with the "freeze" button that is just to the right of the play button.

Below the stretch slider, you can see the window size in samples. This parameter can have quite a profound impact in the final result. Paulstretch breaks up the audio file in multiple slices and this parameter changes the size of those slices, affecting the character of the resulting sound as will hear below.

Let's explore how all these settings will affect different audio samples. First, here is a recording of my voice on the left and the stretched version with default values on the right hand side:

Cool. As you can see on the file name above, 8X is the stretch value while 7.324K is the window size in samples. Notice that the end of the file that Paulstretch created cuts abruptly. This can be fixed using lower values of window size to create a smoother fade out. This is the classic Paulstretch sound: kind of dreamy, clean and with no noticeable artefacts. You will also notice that, although the original is mono, the stretched version feels more open and stereo.

Just for fun, let's see how the Pro Tools and Izotope RX 6 pitch algorithms deal with a 8x time stretch:

This kind of "artefacty" sound is interesting, useful and even beautiful in its own way. But in terms of cleanly stretching a sound without massively changing its timbre, Paulstretch is clearly the way to go.

Let's play now with the window size value and see how this affects the result. Intermediate values seem to be the cleanest, we are just extending the sound in the most neutral way possible. Lower values (under 3K aprox) will have poor frequency resolution, introducing all sorts of artefacts and a flangerish kind of character. A couple of examples of applying low values to the same vocal sample:

Using a different recording we get a whole new assortment of artefacts. Below, you can see the original recoding on the left, the processed version with the default, dreamy settings on the centre and lastly, on the right, a version with a low window value that seems to summon beelzebub himself. Awesome.

On the other hand, Higher values (over 15K aprox) are better at frequency resolution but the the time resolution suffers. This means that, since the chunks are going to be bigger, frequency response is more accurate and faithful to the original sound, but in terms of time, everything is smeared together into a uniform texture with timbres and chracters from different sections of the original sample blending together. So, it doesn't really make sense to use high values with short, homogeneous sounds. Longer and more heterogeneous sounds will yield more interesting results as in this case different frequencies will be mixed together.

You can hear below an example with speech. Again, original on the left, dreamy default values on the centre and high values on the right. You can still understand syllables and words with a lower window value (centre sample) but with a 66K value the slices in this case are 2 seconds long, so different vocal sounds blend together in an unintelligible texture.

Basically, high window values are great for creating smearing textures from heterogeneous audio. Here is another example to help you visualize what the window size does.

On the left, you have a little piece of music with two very different sections: a music box and a drum and bass loop. Each of them is around 3-4 seconds long. If we use a moderate window size (centre sample below) we will hear a music box texture and then a drum texture. The different music notes are blended together but we can still have a sense of the overall harmony. On the third sample (right) we use a window size that yields a slice bigger than 4 seconds, resulting in a blended texture of both the music box and the drums.

Not only can you choose the window size, but also the type of window. Sort of the shape of the slices. Rectangular/Hamming deal better with frequency but they introduce more noise and distortion. Blackman types produce much less noise but they go nuts with the frequency response. See some examples below:

Adding flavour

Jumping now to the Process tab, here we have several very powerful settings to do sound design with.

Harmonics will remove all frequencies form the sample except for a fundamental frequency and a number of harmonics that you can set. You can also change the bandwidth of these harmonics. A lower number of harmonics and a lower bandwidth will yield more tonal results since a fundamental frequency will dominate the sound, while higher values will be closer to the original source having more frequency and nosie content.

See samples below, the first two are the original recording on the left and the stretched version with no harmonic processing on the right. I left the window size kind of low so we have some interesting frequency warping there.  Further below, you can hear several versions with harmonic processing applied and increasingly higher bandwidths. Hear how the first one is almost completely tone and then more and more harmonic and noise content creeps in. I's surprising how different they are from each other.

Definitely very interesting for creating drones and soundscapes, Paulstretch behaves here almost like a synthetizer, it seems like it creates frequencies that were not there before. For example:

Also worth mentioning are the pitch controls. Pitch shift will just tune the pitch as any other pitch shift plugin. Frequency shift creates a dissonant effect by shifting all frequencies by a certain amount. Very cool for scary and horror SFX.

The octave mixer creates copies of your sound and shifts them to certain octaves that you can blend in. Great for calming vibes. See examples below:


Lastly, the spread value is supposed to increase the bandwidth of each harmonic which results in a progressive blend of white noise in the signal as you push the setting further. The cool thing about this, is that the white noise will follow the envelope of your sound. This could be used to create ghostly/alien speech. Here are some examples with no spread on the left and spread applied on the right:

And that's it form me! I hope you now have a good idea of what Paulstretch can do. I see a lot of potential to create drones, ghostly horror soundscapes, sci-fi sounds and cool effects for the human voice. Oh, and also just stretching things up to 31 billion years is nice too.

Mini Library

Here is a mini library I've put together with some of the example sounds, some extended versions an a bunch of new ones. It includes creatures, drones, voices and alien winds. Feel free to use them on your projects.

An Introduction to Game Audio

Talking to a fellow sound designer about game audio, I realised that he wasn't aware of some of the differences between working on audio for linear media (film, animation, TV, etc) and for interactive media (video games).

So this post is kind of my answer to that. A brief introduction to the creative depth of video game sound design. This would be aimed to audio people who are maybe not very familiar with the possibilities this world offers or just want to see in which way is different to, say, working on film sound design.

Of course there are many differences between linear and interactive sound design, but perhaps the most fundamental, and the most important for somebody new to interactive sound design, is the concept of middleware. In this post, I’ll aim to give beginners a first look at this unfamiliar tool.

I'll use screenshots from Unearned Bounty, a project I've been working on for around a year now. Click on them to enlarge. This game runs with Unity as the engine and Fmod as the audio middleware.

Linear Sound vs Interactive Sound

Video games are an interactive media and this is going to influence how you face the sound design work. In traditional linear media, you absolutely control what happens in your timeline. You can be sure that, once you finish your job, every time anyone presses play that person is going to have the same audio experience you originally intended, provided that their monitoring system is faithful.

Think about that. You can spend hours and hours perfecting the mix to match a scene since you know is always going to look the same and it will always be played in the same context. Far away explosion? Let's drop a distant explosion there or maybe make a closer FX sound further away. No problem. 

In the case of interactive media, this won´t always be the case. Any given sound effect could be affected by game world variablesstates and context. Let me elaborate on those three factors. Let's use the example of the explosion again. In the linear case, you can design the perfect explosion for the shot, because is always going to be the same. Let's see in the case of a game:

  • The player could be just next to the explosion or miles away. In this case, the distance would be a variable that is going to affect how the explosion is heard. Maybe the EQ, reverb or compression should be different depending on this.

  • At the same time, you probably don't want the sound effect to be exactly the same if it comes from an ally instead of the player. In that case, you'd prefer to use a simpler, less detailed SFX. One reason for this could be that you want to enhance the sound of what the player does so her actions feel more clear and powerful. In this case, who the effect belongs to, would be a state.

  • Lastly, is easier to make something sound good when you always know the context. In video games, you may not always know or control which sounds will play together. This forces you to play-test to make sure that sounds not only work in isolation but also together and in the proportions that usually the player is going to hear. Also, different play styles will alter these proportions. So, following with our example, your explosion may sound awesome but maybe at the same time dialogue is usually being played and is getting lost in the mix and you'd need to account for that.

After seeing this, linear sound design may feel more straightforward, almost easy in comparison. Well, not really. I´ll explain with an analogy. Working on linear projects, particularly movies, is like writing a book. You can really focus on developing the characters, plot and style. You can keep improving the text and making rewrites until you are completely satisfied. Once is done, your work is always going to deliver the same experience to anyone who reads the book.

Interactive media, on the other hand, is closer to being a game master preparing a D&D adventure for your friends. You may go into a lot detail with the plot, characters and setting but like any experienced GM knows, players will somewhat unpredictable. They will spend an annoying amount of time exploring some place that you didn´t give enough attention to and then they will circumnavigate the epic boss fight by some creative rule bending or a clever outside the box idea.

So, as you can see, being a book writer or working in linear sound design gives you the luxury of really focusing on the details you want, since the consumer experience and interaction with your creation is going to be closed and predictable. In both D&D and interactive media, you are not really giving the final experience to the players, you are just providing the ingredients and the rules that will create a unique experience every time.

Creating those ingredients and rules is our job. Let's explore the tools that will help us with this epic task.

Audio Middleware and the Audio Event

Here you can see code being scary.

Games, or any software for that matter, is built from a series of instructions that we call code. This code manages and keeps track of everything that makes a game run: graphics, internal logic, connecting to other computers through the internet and of course, audio.

The simplest way of connecting a game with some audio files is just calling them from the code whenever we need them. Let's think about a FPS game. We would need a sound every time the players shoots her shotgun. So, in layman's terms, the code would say something like: "every time the players clicks her mouse to shoot, please play this shotgun.wav file that you will find in this particular folder". And we may don't even need to say please since computers don't usually care about such things.

This is how all games were done before and is still pretty much in use. This method is very straightforward but also very limited. Incorporating the audio files into the game is a process that is usually called implementation and this is its more rudimentary form. The thing is, code can be a little scary at first, specially for us audio people who are not very familiar with it. Of course, we can learn it, and is an awesome tool if you plan to work in the video game industry, but at the end of the day we want to be focusing on our craft.

Middleware was created help us with this and fill the gap between the game code and the audio. It serves as a middle man, hence the name, allowing sound designers to just focus on the sound design itself. In our previous example, the code was pointing to specific audio files that were needed in any given moment. Middleware does essentially the same thing but puts an intermediate in the middle of the process. This intermediate is what we call an audio event

An example of audio events managing the behaviour of the pirate ships.

An audio event is the main functional unit that the code will call whenever it needs a sound. It could be a gunshot, a forest ambience or a line of dialogue. It could contain a single sound file or dozens of them. Anytime something makes a sound, is triggering an event. The key thing is that, once the code is pointing to an event, we have control, we can make it sound the way we want, we are in our territory.

And this is because middleware uses tools that we audio people are familiar with. We'll find tracks, faders, EQs and compressors. Keep in mind that these tools are still essentially code, middleware is just offering us the convenience of having them in an comfortable and familiar environment. Is bringing the DAW experience to the game development realm.

Audio middleware can be complex and powerful and I'd need a whole series of posts to tell you what they can do and how. So, for now. I'm just going to go through three main features that should give you an idea of what they can offer.

I - Conventional Audio Tools within Middleware

Middleware offer a familiar environment with tracks, timelines and tools similar to the ones found on your DAW. Things like EQ, dynamics, pitch shifters or flangers are common.

This gives you the ability to tweak your audio assets without needing to go back and forth between different softwares. Probably you are still going to start from your DAW and build the base sounds there using conventional plugins, but being able to also do processing within the middleware gives you flexibility and, more importantly, a great amount of power as you'll see later.

II - Dealing with Repetition and Variability

The player may perform some actions over and over again. For example, think about footsteps. You generally don't want to just play the same footstep sound every single time. Even having a set of, say 4 different footsteps, is going to feel repetitive eventually. This repetitiveness is something that older games suffer from and that generally modern games try to avoid. The original 1998 Half-Life, for example, uses a set of 4 footstep sounds per surface. Having said that, it may still be used when looking for a nostalgic or retro flavour the same way pixel art is still used. 

Middleware offer us tools to make several instances of the same audio event, sound cohesive but never exactly identical. The most important of these tools are variations, layering and parameter randomization.

The simplest approach to avoid repetition is just recording or designing several variations on the same effect and let the middleware choose randomly between them every time the event is triggered. If you think about it, this imitates how reality behaves. A sword impact or an footstep are not going to sound exactly the same every single time, even if you really try to use the same amount of force and hit on the same place. 

You could also break up a sound into different components or layers. For example, a gunshot could be divided in a shot impact, its tail and the bullet shell hitting the ground. Each of this layers could also have their own variations. So now, every time the player shoots, the middleware is going to randomly choose an impact, a tail and a bullet shell sound, creating a unique combination.

Another cool thing to do is to have an event with a special layer that is triggered very rarely. By default, every layer on an event has a 100% possibility to be heard but you can tweak this value to make it more infrequent. Imagine for example a power-up sound that has an exciting extra sound effect but is only played 5% of the time the event is called. This is a way to spice things up and also reward players who spend more time playing.

An additional way of adding variability would be to randomize not only which sound clip will be played, but also their parameters. For example, you could randomize volume, pitch or panorama within a certain range of your choice. So, every time an audio clip is called, a different pitch and volume value are going to be randomly picked.

Do you see the possibilities? If you combine these three techniques, you can achieve an amazing degree of variability, detail and realism while using a relative small amount of audio files.

See above the collision_ashore event that is triggered whenever a ship collides with an island. It contains 4 different layers: 

  • A wood impact. (3 variations)

  • Sand & dirt impacts with debris. (3 variations)

  • Wooden creaks (5 variations)

  • A low frequency impact.

As I said, each time the event is triggered, one of this variations within each layer will be chosen. If we then combine this with some pitch, volume and EQ randomization we will assure that every instance of the event will be unique but cohesive with the rest.

III - Connecting audio tools to in-game variables and states.

This is where the real power resides.

Remember the audio tools built-in into middleware that I mentioned before? In the first section I showed you how we can use these audio tools the same way we use them on any DAW. Additionally, can also randomize their values, like I showed you in the second section. So here comes the big one.

We can also automate any parameter like volume, pitch, EQ or delay in relation to anything going on inside the game. In other words, we will have a direct connection between the language of audio and the language the game speaks, the code. Think about the power that that gives you. Here are some examples:

  • Apply an increasing high pass filter to the music and FX as the protagonist health gets lower.

  • Apply a delay to cannon shots that gets longer the further away the shot is, creating a realistic depiction of how light travels faster than sound.

  • Make the tempo of a song gets faster and its EQ brighter as you approach the end of the level.

  • As your sci-fi gun wears off, the sounds get more distorted and muffled. You feel so relieved when you can repair it and get all its power back.

Do you see the possibilities this opens? You can express ideas in the game's plot and mechanics with dynamic and interactive sound design! Isn't that exciting? The takeaway concept that I want you to grasp from this post is that you would never be able to do something this powerful with just linear audio. Working on games makes you think much harder about how sound coming from objects and creatures behaves, evolves and changes. 

As I said before,  you are just providing the ingredients and the rules, the sound design itself only materializes when the player starts the game. 

You can see on the above screenshot how an in-game parameter, distance in this case, affects an event layers' volume, reverb send and EQs.

How to get started

If I have piqued your interest, here are some resources and information to start with.

Fmod and Wwise are currently the two main middleware used by the industry. Both are free to use and not very hard to get into. You will need to re-wire your brain a bit to get used to the way they work, though. Hopefully, reading this post gave you a solid introduction on some of the concepts and tools they use.

If I had to choose one of them, Fmod could look less intimidating at first and maybe more "DAW user friendly". Of course, there are other options, but if you just want to have a first contact, Fmod does the job.

There are loads of resources and tutorials online to learn both Fmod and Wwise, but since I think that the best way to really learn is to jump in and make something yourself, I'll leave you with something concrete to start from for each of them:

Fmod has these very nice tutorials with example projects that you can download and play with.

Wwise has official courses and certifications that you can do for free and and also include example projects.

And of course, don't hesitate to contact me if you have further questions. Thanks for reading!

Pro Tools Functions, Tips and Tricks for Sound Design

Here is a compilation of tips and tricks for sound design and editing with Pro Tools. Some of these shortcuts could be obvious to the seasoned Sound Designer but you’d never know, you might learn a new trick or two. For the purposes of this post, I’ll assume that most readers are Mac users, although most of this content should also be PC-compatible.

The post contains short videos which demonstrate the shortcuts discussed in each section. If you have Pro Tools at hand, I would recommend that you open it and follow along. Let's go!

Use memory locations to mark sync points and scene changes.
Pretty basic but worth mentioning. You can add memory locations to your timeline and use them to mark certain key moments. As you import new clips to your session, these markers will be very helpful in lining up different layers. You can also jump between markers with shortcuts, which is particularly useful in long sessions with multiple scene changes.

Shortcut Function
Enter (numeric keyboard) Create new marker at playhead position.
Cmd + 5 (numeric keyboard) Open the memory location window.
Opt + Click on marker Deletes the marker.
"." (numeric keyboard) + marker number + "." (numeric keyboard) Jump to a marker location

Note: If your numeric keypad is on Classic Mode you can skip the first "." when recalling a memory location.


Using X-Form + Elastic Properties
This is my preferred method for quick clip pitch and length changes. It doesn't work very well for big changes but is good enough for small adjustments and you can tweak both parameters independently This is not a real time process, the changes are rendered offline and you'll keep the original version if you need to go back to it.

To use this method, you will need to activate X-Form in the track elastic properties, it's just under the track automation mode. (Video Bellow)

X-Form pitch changes work great when you have a sound that is similar to what you need but you feel it needs to be a little bigger or smaller in weight. The results are not always natural sounding, but adjusting the pitch can sometimes bring a clip close to the sound you're looking for.

Also, being able to change the length of a clip makes your library instantly bigger. Now your clips may work on more situations as you can make them shorter or longer to fit in context.

And don't forget this tool could be also used as a creative resource. Listen to the following clip where some plastic bag impacts are extremely slowed down, creating a weird, distorted kind of Sci-Fi sound. You can hear bellow the original sound first and then the processed one.

Shortcut Function
Alt + 5 (numeric keyboard) Opens the elastic properties for the selected clip.

Tab to transients. 

Again, pretty basic but super useful. When activated, (under the trim tool or with the fancy shortcut) you can use the tab key to jump between transients instead of clip boundaries. Very handy when editing steps, gun shots or impacts.

This function is great when working with just a few short clips, but If you just want to create clip separations on transients on a long file with loads of steps, the best to do this would be to use the function "Separate Clip on Transients".

Shortcut Function
Opt + Cmd + TAB Toggles "Tab to Transients" on and off.
TAB Jump between transients or clip boundaries.
B Separate Clip.
No official shortcut, but keep reading for a workaround! Separate Clip on Transients

Shortcuts in the ASDFG keys (cuts and fades). 

Naturally, my left hand is usually in a WASD position but when editing in Pro Tools, your fingers should be on the ASDFG keys to allow you to quickly trim and fade clips. It might take some time to get used to using these, but in no time at all, it will become second nature. Remember that you need to be on keyboard focus to use these.

Shortcut Function
A Trim Start
S Trim End
D Fade In
F Cross Fade
G Fade Out

Ctrl + click to move a clip to the playhead position.

To align two clips, select the clip to which you want to align the other(s) and then press Ctrl + click on the second clip to align them.. Also works on markers. Simple and neat.


Move a clip from one track to another without changing its sync.

Just press and hold Ctrl while moving a clip from one track to another and it will keep its timeline position no matter how much you horizontally move your mouse.. Add Opt to the shortcut to also duplicate the clip.


Fill gaps. 

This is very useful when you have an unwanted noise on an ambience track.

To eliminate the offending noise, first select it and press Cmd + B to remove it. Then select and copy another similar region in the audio clip, ideally longer than the gap you have removed. Lastly, select the area to fill and do a paste special repeat to fill selection. You can then cross fade the boundaries to make it seamless.

You can use this method rather than copying a section of audio and having to adjust the clip manually to fill the gap.. this shortcut does that tedious work for you!

Last thing, if your selection when copying is smaller than the gap itself, Pro Tools is going to paste the same clip several times until the gap is filled. It will also create crossfades between these copies of your selection. This won't probably sound very smooth but it may work if the gap is not very big and/or the scene is busy.

Shortcut Function
Cmd + B Clear or remove selection from clip.
Opt + Cmd + V Paste special repeat to fill selection.

Easy access to your most used plugins 

You can select your preferred EQ and Compressor plug-ins by going to Setup > Preferences > Mixing.

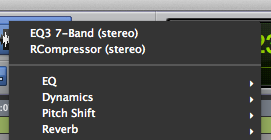
You can also select you most commonly-used plug-ins to appear at the top of your inserts list, by holding Cmd and then selecting the relevant plug-in in an insert slot. This also works with AudioSuite plug-ins.


Have Audiosuite plugins at hand with window configurations.

The previous trick will allow you to have your AudioSuite plug- ins at hand but there is an even quicker and better way to quickly access AudioSuite plugins.

First, open the AudioSuite plugin of your choice, you can even do this with more than one plugin at the same time. Now, create a new window configuration using the Window Configurations window or the shortcut. You can then call that window configuration to summon the plugin or even incorporate it in a memory location as you can see in the picture on the right.

Keep in mind that window configurations can do much more than that, you can save any edit and/or mix window distribution set up and easily toggle between them.

More info.

Shortcut Function
Opt + Cmd + J Open Window Configurations.
"," + Number from 1 to 99 + "+" (Numeric Keyboard) Create new window configuration.
"," + Window Configuration Number + "*" (Numeric Keyboard) Recall window configuration.

Or impress your friends with custom shortcuts...

Memory locations + Window configurations are very powerful. But there is hidden feature that may be even better for accessing Pro Tools functions. You can create your own custom shortcuts for unmapped commands and without any external macro software.

As far as I know, this only works on mac. Just go to Apple > System Preferences > Keyboard > Application Shortcuts and add Pro Tools to the list if it wasn't there already. Now you can create (Plus symbol button) a new shortcut to any Pro Tools function your heart desires as long as that function appears on any Pro Tools menu. Even AudioSuite plugin names. You just need to type the exact name and then add the shortcut you want to assign to that given function.

This blew my mind when I discovered it, you can now access loads of functions even if they are buried under 3 sub-menus.
Here is a list of some of the custom shortcuts I'm currently using, I tend to use Control as the modifier key since Pro Tools doesn't use it much:

Shortcut Exact function name Description
Ctrl + C Color Palette Pimp those tracks!
Ctrl + S Izotope RX 6 Connect Opens the window to send audio to RX
Ctrl + R Reverse AudioSuite Reverse Plugin
Ctrl + V Vari-Fi AudioSuite Vari-Fi Plugin
Ctrl + T At Transients Separates a clip on its transients
Ctrl + E EQ3 7-Band AudioSuite EQ Plugin
Ctrl + G Render Renders Clip Gain
Ctrl + P Preferences...
Ctrl + D Delete Deletes empty tracks
Ctrl + Opt + D Delete... Deletes non-empty tracks
Opt + Cmd + S Save Copy In....
Ctrl + Opt + Cmd + B QuickTime... Bounce to Quicktime

As you can see, you need two distinct shortcuts to delete tracks since the dialog is different depending on the contents of the track. With the set up I have, using "Ctrl + Opt + D" will always delete the track, regardless of its content, but it will only show the warning window if the track has content on it.

Of course, these are only the ones I currently have, I change them all the time. There are many other functions that you could hook up like I/O, Playback Engine, Hardware, Make Inactive (for tracks). Go nuts!


Automation Follows Edit is your friend.

By default, is a good a idea to keep this option on, so when you move a clip, its automation moves with it. But sometimes, especially when doing sound design, you want to swap a clip with another without moving the automation so you can hear how the same processing affects a different clip.

Just remember to turn this back on when you finish or you may mess things up badly. In newer Pro Tools versions like 12 the button will go bright orange to remind you the function is off which is very handy.


Moving through the session

My workflow is based on the mouse wheel because that's what I had when I started with Pro Tools. It might not be the fastest or most efficient way of working but it’s what I’m used to and I can move pretty fast through a session with this method. 

I use the mouse wheel to move horizontally and I like to use the "Mouse Wheel Scrolling Snaps to Track" feature (Pro Tools preferences > Operation > Misc) so every mouse wheel click is a track's length.

To move horizontally, I use Shift + the mouse wheel. To zoom, I use Alt + the mouse wheel or the R/T keys.

Shortcut Description
Shift + Mousewheel Move Horizontally in the timeline.
Alt + Mousewheel Zoom in and out.
R Zoom out.
T Zoom in.

Automation

You don't usually need to do complex automations while designing but here are some handy shortcuts to speed you up so you can focus on the actual sound design. One of the most tricky and annoying things is to move automation around and to automate one or more parameters on a plugin. These shortcuts may help. For accessibility, I'll avoid talking about HD features.

Shortcut Function Comment
"," "." Nudge automation. Select a section of an automation curve and nudge it to position.
Really useful when you are early or late on a automation pass.
(Pictured in the video bellow).
Ctrl + Opt + Cmd + Click Enable automation. Use it on a plugin parameter to make it "automable" or on the "Plugin
Automation Enable" button to enable everything.
Ctrl + Cmd + Click Show automation lane. Shows the automation lane for the selected parameter. Saves me hours.
Ctrl + Cmd + Left & Right Arrow Keys Change Track View Flip through track views. Very handy to go betweeen waveform,
volume and pan views.

Import Session Data

This is a very powerful and somewhat overlooked feature that allows you to import audio and other information from any sessions.

The key concept is that you can bring different elements independently. You could, for example, bring one track's plugins or its I/O without bringing any audio. 

If you decide to import audio, you can choose between just referencing the audio from the other session or to copying it on your current session's audio folder which would be a safer option.

You can also bring memory locations and window configurations. Remember those fancy window configuration shenanigans I was talking about above? You could import your little creations from other sessions with this!


Show number of tracks

Just go to View > Track Number. Very simple, but sometimes you want to know how many tracks you have used so you can brag about your unreasonable layering needs.


Miscellaneous useful shortcuts

And finally, here are some random shortcuts and functions:

Shortcut Function Comment
"*" (Numeric Keyboard) Enter timecode. Lets you type in the counter window so you can jump to any point on the timecode.
Also, this counter acts as a calculator so you can type + or - to jump a certain
amount of timecode forward or backwards.
Shift + Cmd + K Export Clips as Files A somewhat hidden feature (it's on the clip list window, not the main menus
that allows you to quickly export any clip as a separate file. You'll be able to
choose the settings of the new audio file but remember this is not the same
as a bounce, inserts and sends won't be considered.
Alt + Cmd + "[" or "]" Waveform Zoom Changes the waveform zoom in or out. Very useful when you need to work
with a zoom level that makes sense with the material you have. 
Ctrl + Opt + Cmd + [ Reset Waveform Zoom Resets the waverform zoom in case you want to see how loud a clip really looks.
Ctrl + Shift +
Arrow up/down or mousewheel
Nudge Clip Gain. It even works with several of them at the same time. A must if you use clip
gain a lot. Keep in mind that you are going to jump in a determined amount of
dB that you can change at Preferences > Editing > Clips > Clip Gain Nudge
Value. I usually use 0.5 dB but sometimes I like a smaller value.
None, Double Click on a
Crosfade and select
Equal Power.
Equal Power
(Crossfades)
Use this when there is a drop in volume on a crossfade. This setting will make
the transition much smoother.

That's it. Questions? Suggestions? Did I forget your favourite trick? Leave a comment!